Re-creating ChatGPT iOS App using OpenAI API (1)
After creating a simple Map Prototype, I wanted to delve in more complex side of SwiftUI - I spent quite amount of time on learning Metal (which I'd like to cover here at some point), then wanted to try something that involves API calling and receiving data. And then I stumbled upon this thread post and decided to try AI chatbot API. Because… why not?
I decided to go with chatGPT after poking around some services including Gemini and Claude. Mostly because I found this nice GPT package called MacPaw. There are individual open-source packages for Claude and Gemini. But to me MacPaw was the most straightforward and easier to follow. This youtube video also helped me a lot. Actually allowed me to build the most of it.
Setting up
To begin with, you need to sign up on OpenAI Platform - which gives you a private API key to enable communication. You just need to sign up and add your payment method. Then get a private API key (which should not be shared). Price is pretty reasonable especially if you're using older model like GPT-3.5. For testing purpose I used 3.5 because it's the cheapest.

I then went ahead a create a completely new project and downloaded GPT package. You can follow the youtube video (which actually cover whole end to end process to build the entire thing) but this is the basically screen that you're looking for. Just find macpaw / openAI then you're good to go.

Writing basics
This part was actually pretty straightforward to me. I basically set up 4 key structures. ChatController Class that allows me to identify messages that I'm getting from OpenAI API.
class ChatController : ObservableObject {

    @Published var messages : [Message] = []

    let openAI = OpenAI(apiToken: "your API key goes here")

    func sendNewMessage(content:String){ //this is you sending a message
        let userMessage = Message(content: content, isUser: true)
        self.messages.append(userMessage)
        getBotReply() // at the end of it, you call another function to get a reply
    }

    func getBotReply() { //Handling response
        //Bunch of code goes here to handling errors and sharing responses.
        }
    }
}
Then you create a Message struct. This allows you to store unique id of the message to differentiate them, chat content to display and most importantly, separate user input and bot response.
struct Message: Identifiable {
    var id: UUID = .init()
    var content: String
    var isUser: Bool
}
Finally, you write views. The example that I followed had one main view to handle everything and a view that creates messages dynamically to the main view. Like this.
struct ContentView: View { //Main View
@StateObject var chatController : ChatController = .init() //Getting Messages from chatController
var body: some View {
VStack{
ForEach(chatController.messages) { //Goes through each messages in the array and create views
message in
MessageView(message: message) //Calling MessageView
.id(message.id)
}
TextField("Message",text:self.$string,axis: .vertical)
.onSubmit {
self.chatController.sendNewMessage(content: string)
} //Send the message
}
}
struct MessageView: View { //Message View
var message: Message
@StateObject var chatController : ChatController = .init()
var body: some View {
Group {
if message.isUser {
Text(message.content) //User Message
} else {
Text(message.conent) //Bot response
}
}
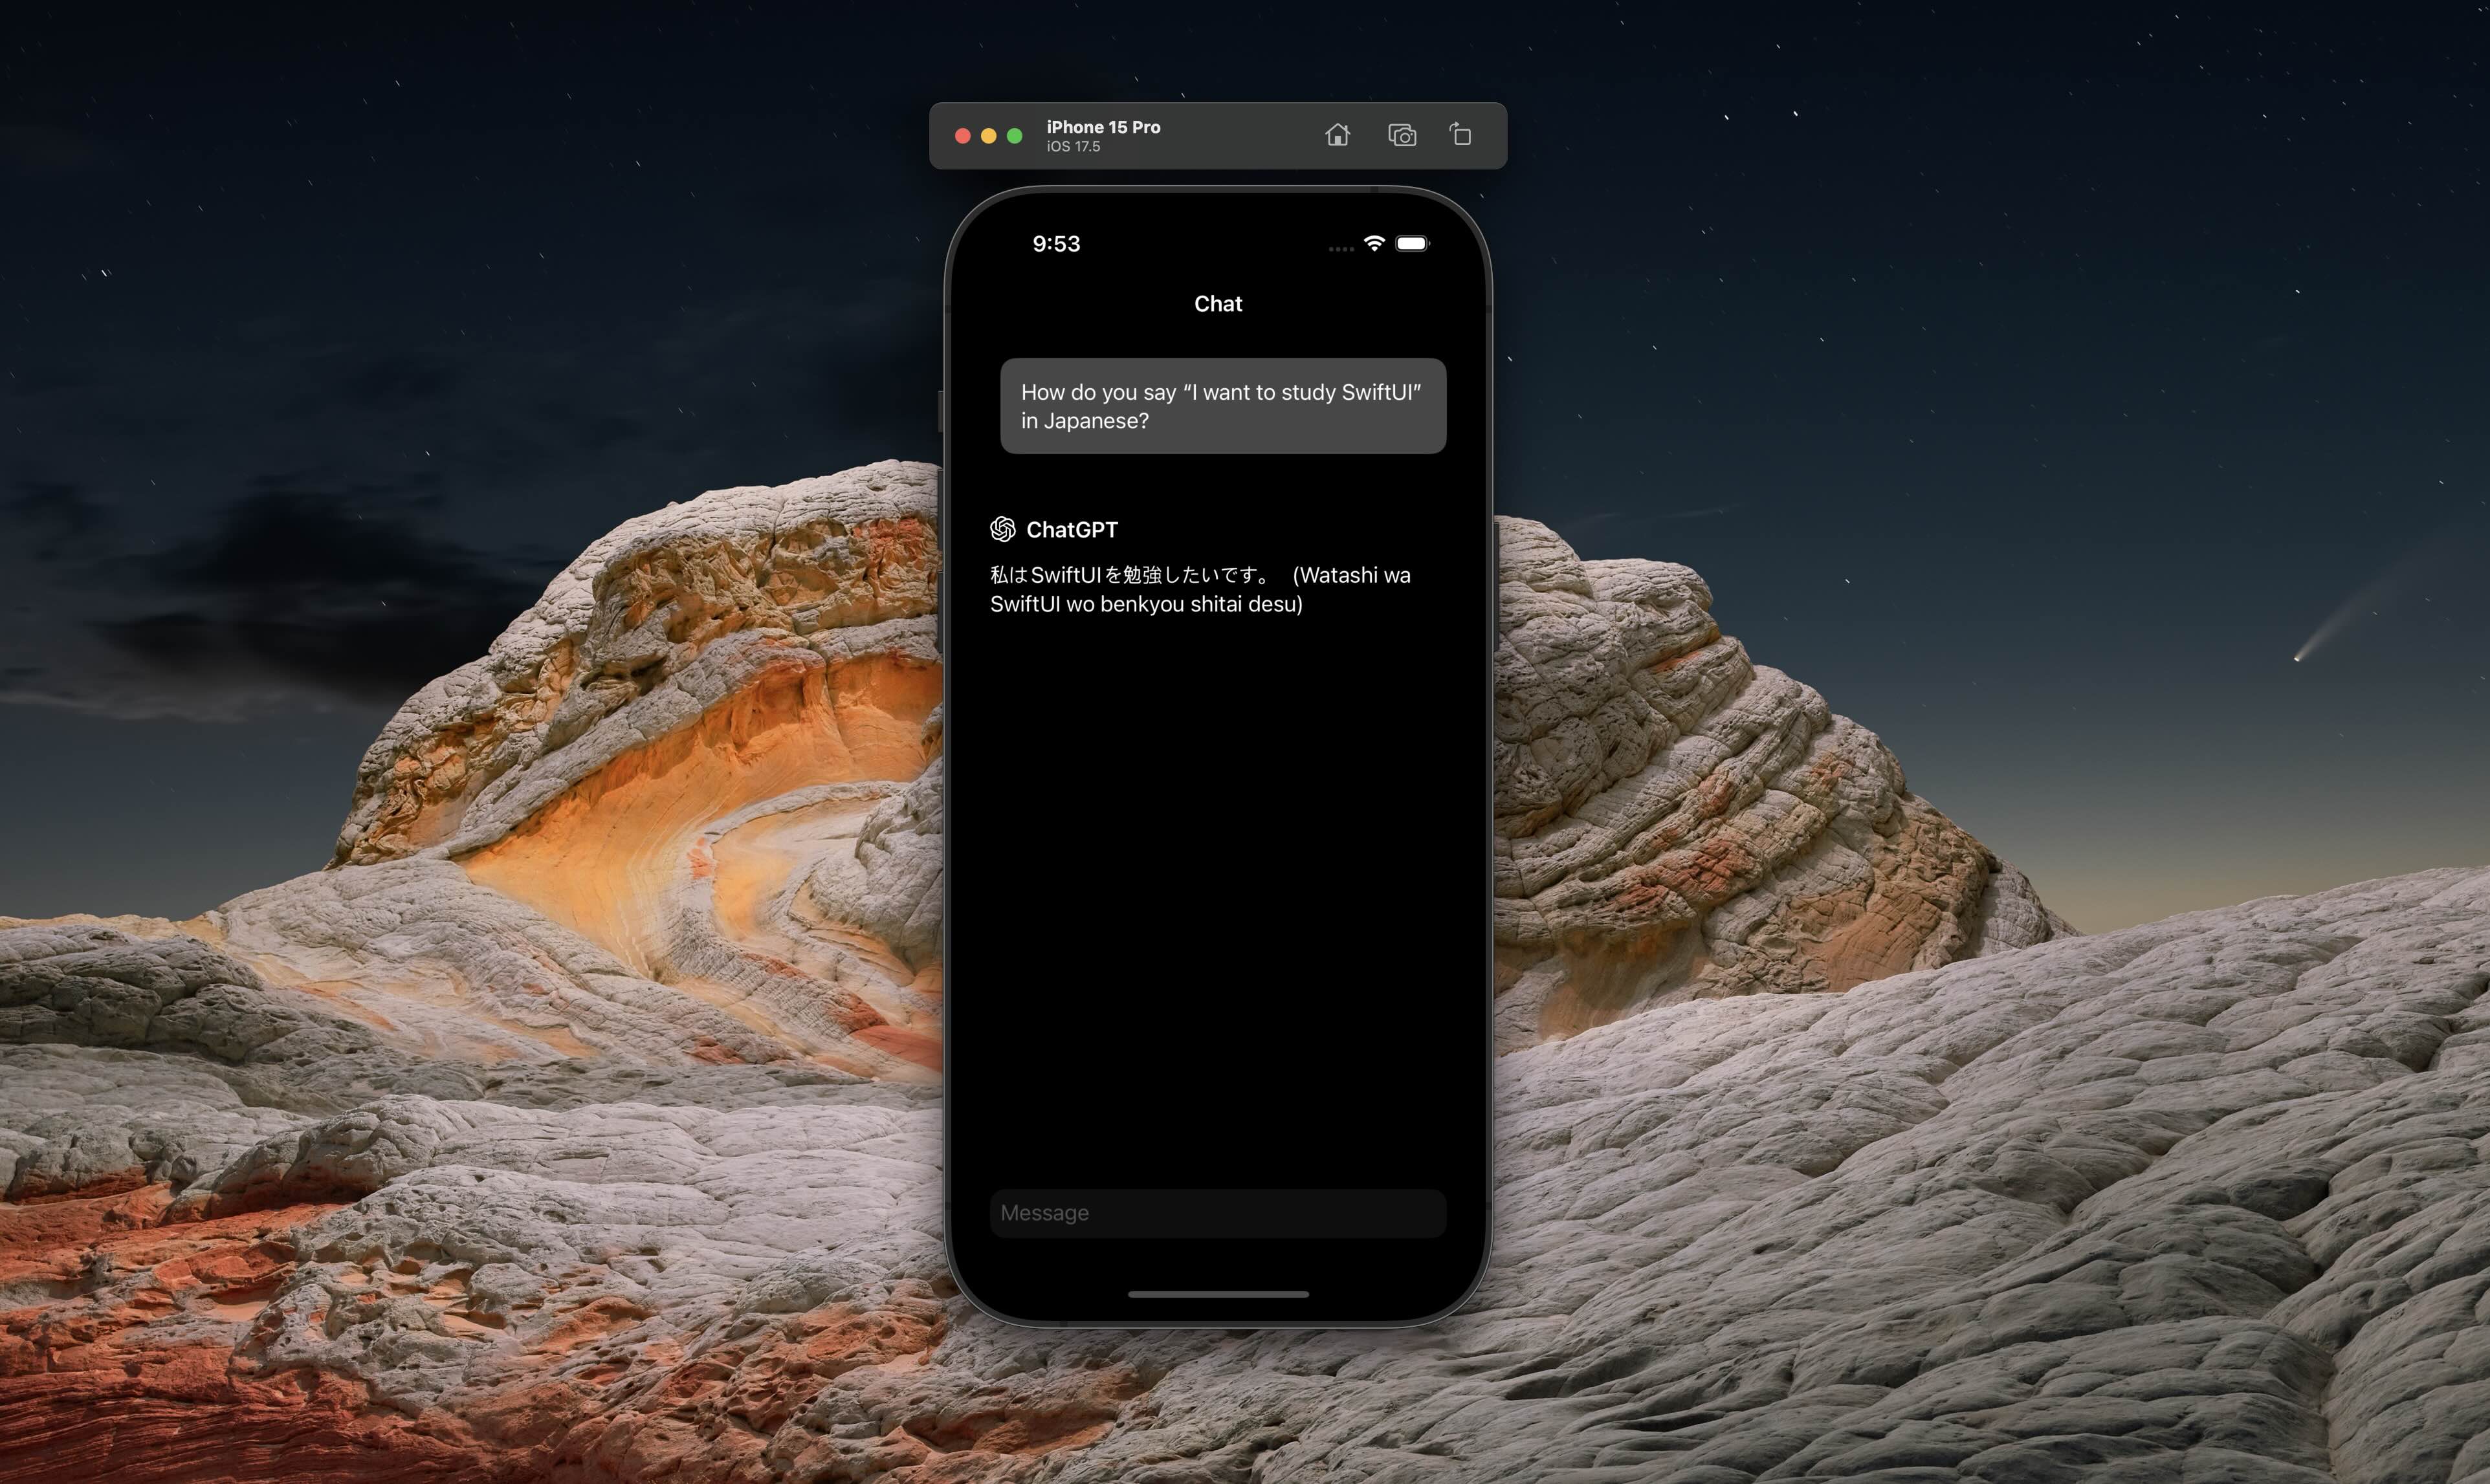
}Now you can basically send and get response from the API. Something like this. The moment that I actually got a response from ChatGPT was pretty amazing. Obviously initial state was more barebone than what I added below. I then started to struggle and learned how to add loading animation, make GPT response more animated, and then auto-scroll, stop scrolling if bot response is too long. I studied how iOS ChatGPT app works and then tried to re-create it. I'll share more in the next post. stay tuned.
Useful links :
After creating a simple Map Prototype, I wanted to delve in more complex side of SwiftUI - I spent quite amount of time on learning Metal (which I'd like to cover here at some point), then wanted to try something that involves API calling and receiving data. And then I stumbled upon this thread post and decided to try AI chatbot API. Because… why not?
I decided to go with chatGPT after poking around some services including Gemini and Claude. Mostly because I found this nice GPT package called MacPaw. There are individual open-source packages for Claude and Gemini. But to me MacPaw was the most straightforward and easier to follow. This youtube video also helped me a lot. Actually allowed me to build the most of it.
Setting up
To begin with, you need to sign up on OpenAI Platform - which gives you a private API key to enable communication. You just need to sign up and add your payment method. Then get a private API key (which should not be shared). Price is pretty reasonable especially if you're using older model like GPT-3.5. For testing purpose I used 3.5 because it's the cheapest.
I then went ahead a create a completely new project and downloaded GPT package. You can follow the youtube video (which actually cover whole end to end process to build the entire thing) but this is the basically screen that you're looking for. Just find macpaw / openAI then you're good to go.
Writing basics
This part was actually pretty straightforward to me. I basically set up 4 key structures. ChatController Class that allows me to identify messages that I'm getting from OpenAI API.
class ChatController : ObservableObject {

    @Published var messages : [Message] = []

    let openAI = OpenAI(apiToken: "your API key goes here")

    func sendNewMessage(content:String){ //this is you sending a message
        let userMessage = Message(content: content, isUser: true)
        self.messages.append(userMessage)
        getBotReply() // at the end of it, you call another function to get a reply
    }

    func getBotReply() { //Handling response
        //Bunch of code goes here to handling errors and sharing responses.
        }
    }
}
Then you create a Message struct. This allows you to store unique id of the message to differentiate them, chat content to display and most importantly, separate user input and bot response.
struct Message: Identifiable {
    var id: UUID = .init()
    var content: String
    var isUser: Bool
}
Finally, you write views. The example that I followed had one main view to handle everything and a view that creates messages dynamically to the main view. Like this.
struct ContentView: View { //Main View

    @StateObject var chatController : ChatController = .init() //Getting Messages from chatController

    var body: some View {
        VStack{
          ForEach(chatController.messages) { //Goes through each messages in the array and create views
             message in
             MessageView(message: message) //Calling MessageView
                .id(message.id)
          }
          TextField("Message",text:self.$string,axis: .vertical)
              .onSubmit {
                  self.chatController.sendNewMessage(content: string)
              } //Send the message
    }
}

struct MessageView: View { //Message View

    var message: Message
    @StateObject var chatController : ChatController = .init()

    var body: some View {
      Group {
        if message.isUser {
          Text(message.content) //User Message
      } else {
          Text(message.conent) //Bot response
          }
  }
}
Now you can basically send and get response from the API. Something like this. The moment that I actually got a response from ChatGPT was pretty amazing. Obviously initial state was more barebone than what I added below. I then started to struggle and learned how to add loading animation, make GPT response more animated, and then auto-scroll, stop scrolling if bot response is too long. I studied how iOS ChatGPT app works and then tried to re-create it. I'll share more in the next post. stay tuned.
Useful links :