Making Map Prototype - giving a life to the object (2)
One of the biggest hurdle for me when it comes to learning programming language was, the lead time. I needed to learn the basics of how variable works, what is function, enum, struct, switch case and then more complex stuff likes nil coalescing, class, extensions. While these concepts are all useful and necessary (especially when you get deeper in the weed) I just run out of my patience as it doesn't give me a visual feedback.
So like I mentioned in the previous article, I really loved how Xcode provides instantaneous feedback in the Canvas. And the first thing that I did was trying to find a way to render something, and make that moving. I'm very used to something like Framer Classic which offered a coffescript based framework that allows you to declare the gesture that you want to detect. So getting to know the way SwiftUI handles gesture wasn't too hard.
Basics are, you add a gesture recognizer as a modifier to the layer that you declared, in this case, a Circle. Whatever happens during drag event, it happens within that .onchanged braces.
// Code simplified for illustrative purpose
Circle()
  .gesture (
    DragGesture()
      .onchanged { value in
        // some code goes here
        }
  )
But how do we move stuffs? we need 3 components here.
@State private var offset : CGSize = .zeroThis is State variable that can be shared within the View. So you set this up just above the body block. And then you can refer to this value and share that across many objects within the view. For example, for the circle that I just defined :
// Code simplified for illustrative purpose
Circle()
  .offset(offset) // Define offset value of the circle.
  .gesture (
    DragGesture()
      .onchanged { value in
        // some code goes here
        }
  )
So if you change the value of offset to something else, then Circle will move within the view. Now, you just need to tie that to drag event. Like this :
// Code simplified for illustrative purpose
Circle()
.offset(offset) // Define offset value of the circle.
.gesture (
DragGesture()
.onchanged { value in
offset = value.translation
}
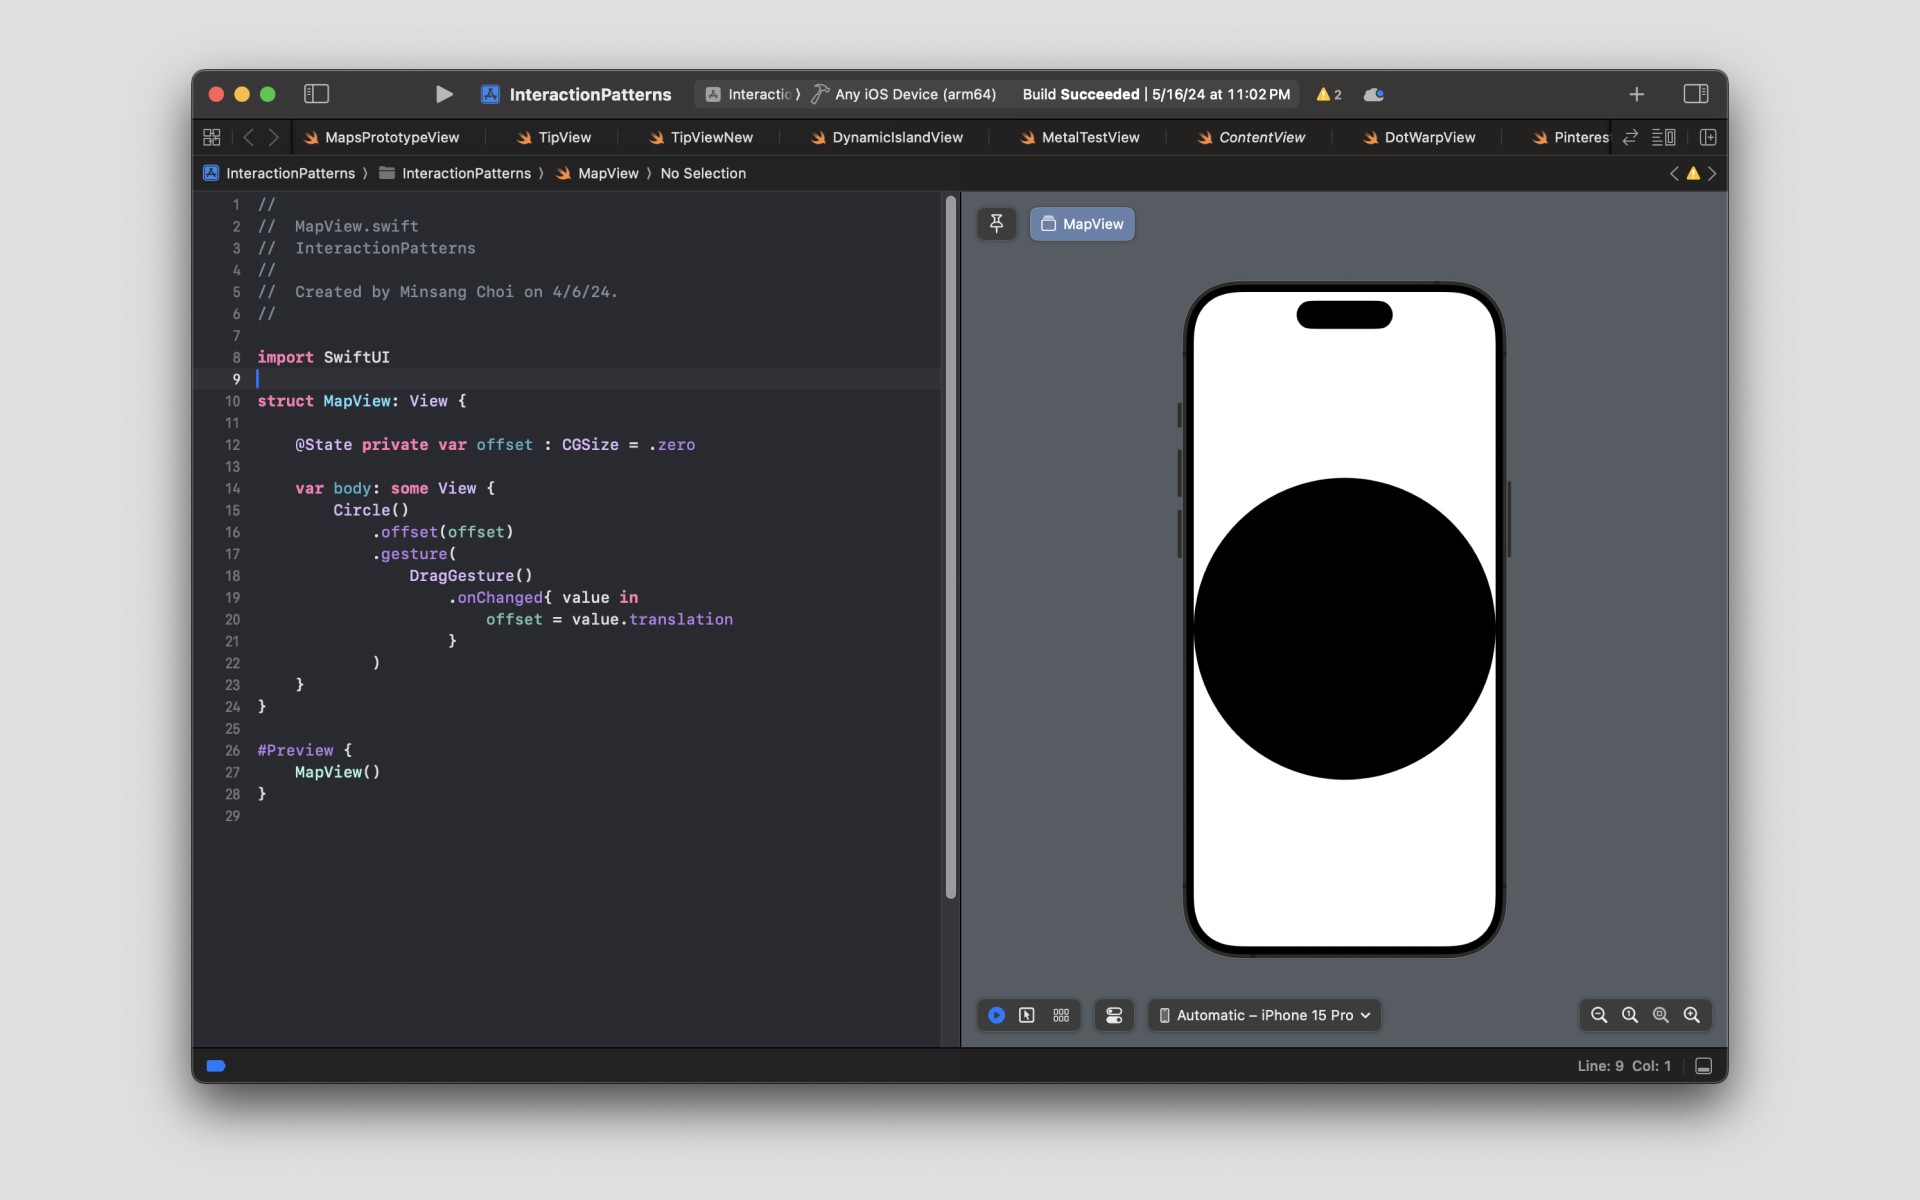
)Completed view looks like this :
So this is the basic of how you tie your gesture to any objects in the view. Try creating bunch of stuffs, rectangle, text, circle, stack… and let it move. For me it was the most fun moment out of everything in the process and something that kept me going.
For me, getting to the animation and make it move was always the first order. Without visual feedback, it didn't feel like I'm getting to know the concept and easily distracted or lost focus. I didn't have to know a lot to enable this. I don't know about you, but just to learn this you might even not need to know the concept of the Swift itself.
That quick turnaround was something made me really like SwiftUI. All I needed was some small crack that I can open up. And this was it.
One of the biggest hurdle for me when it comes to learning programming language was, the lead time. I needed to learn the basics of how variable works, what is function, enum, struct, switch case and then more complex stuff likes nil coalescing, class, extensions. While these concepts are all useful and necessary (especially when you get deeper in the weed) I just run out of my patience as it doesn't give me a visual feedback.
So like I mentioned in the previous article, I really loved how Xcode provides instantaneous feedback in the Canvas. And the first thing that I did was trying to find a way to render something, and make that moving. I'm very used to something like Framer Classic which offered a coffescript based framework that allows you to declare the gesture that you want to detect. So getting to know the way SwiftUI handles gesture wasn't too hard.
Basics are, you add a gesture recognizer as a modifier to the layer that you declared, in this case, a Circle. Whatever happens during drag event, it happens within that .onchanged braces.
// Code simplified for illustrative purpose
Circle()
  .gesture (
    DragGesture()
      .onchanged { value in
        // some code goes here
        }
  )
But how do we move stuffs? we need 3 components here.
@State private var offset : CGSize = .zeroThis is State variable that can be shared within the View. So you set this up just above the body block. And then you can refer to this value and share that across many objects within the view. For example, for the circle that I just defined :
// Code simplified for illustrative purpose
Circle()
  .offset(offset) // Define offset value of the circle.
  .gesture (
    DragGesture()
      .onchanged { value in
        // some code goes here
        }
  )
So if you change the value of offset to something else, then Circle will move within the view. Now, you just need to tie that to drag event. Like this :
// Code simplified for illustrative purpose
Circle()
  .offset(offset) // Define offset value of the circle.
  .gesture (
    DragGesture()
      .onchanged { value in
         offset = value.translation
        }
  )
Completed view looks like this :
So this is the basic of how you tie your gesture to any objects in the view. Try creating bunch of stuffs, rectangle, text, circle, stack… and let it move. For me it was the most fun moment out of everything in the process and something that kept me going.
For me, getting to the animation and make it move was always the first order. Without visual feedback, it didn't feel like I'm getting to know the concept and easily distracted or lost focus. I didn't have to know a lot to enable this. I don't know about you, but just to learn this you might even not need to know the concept of the Swift itself.
That quick turnaround was something made me really like SwiftUI. All I needed was some small crack that I can open up. And this was it.