Snippets from past 3 weeks

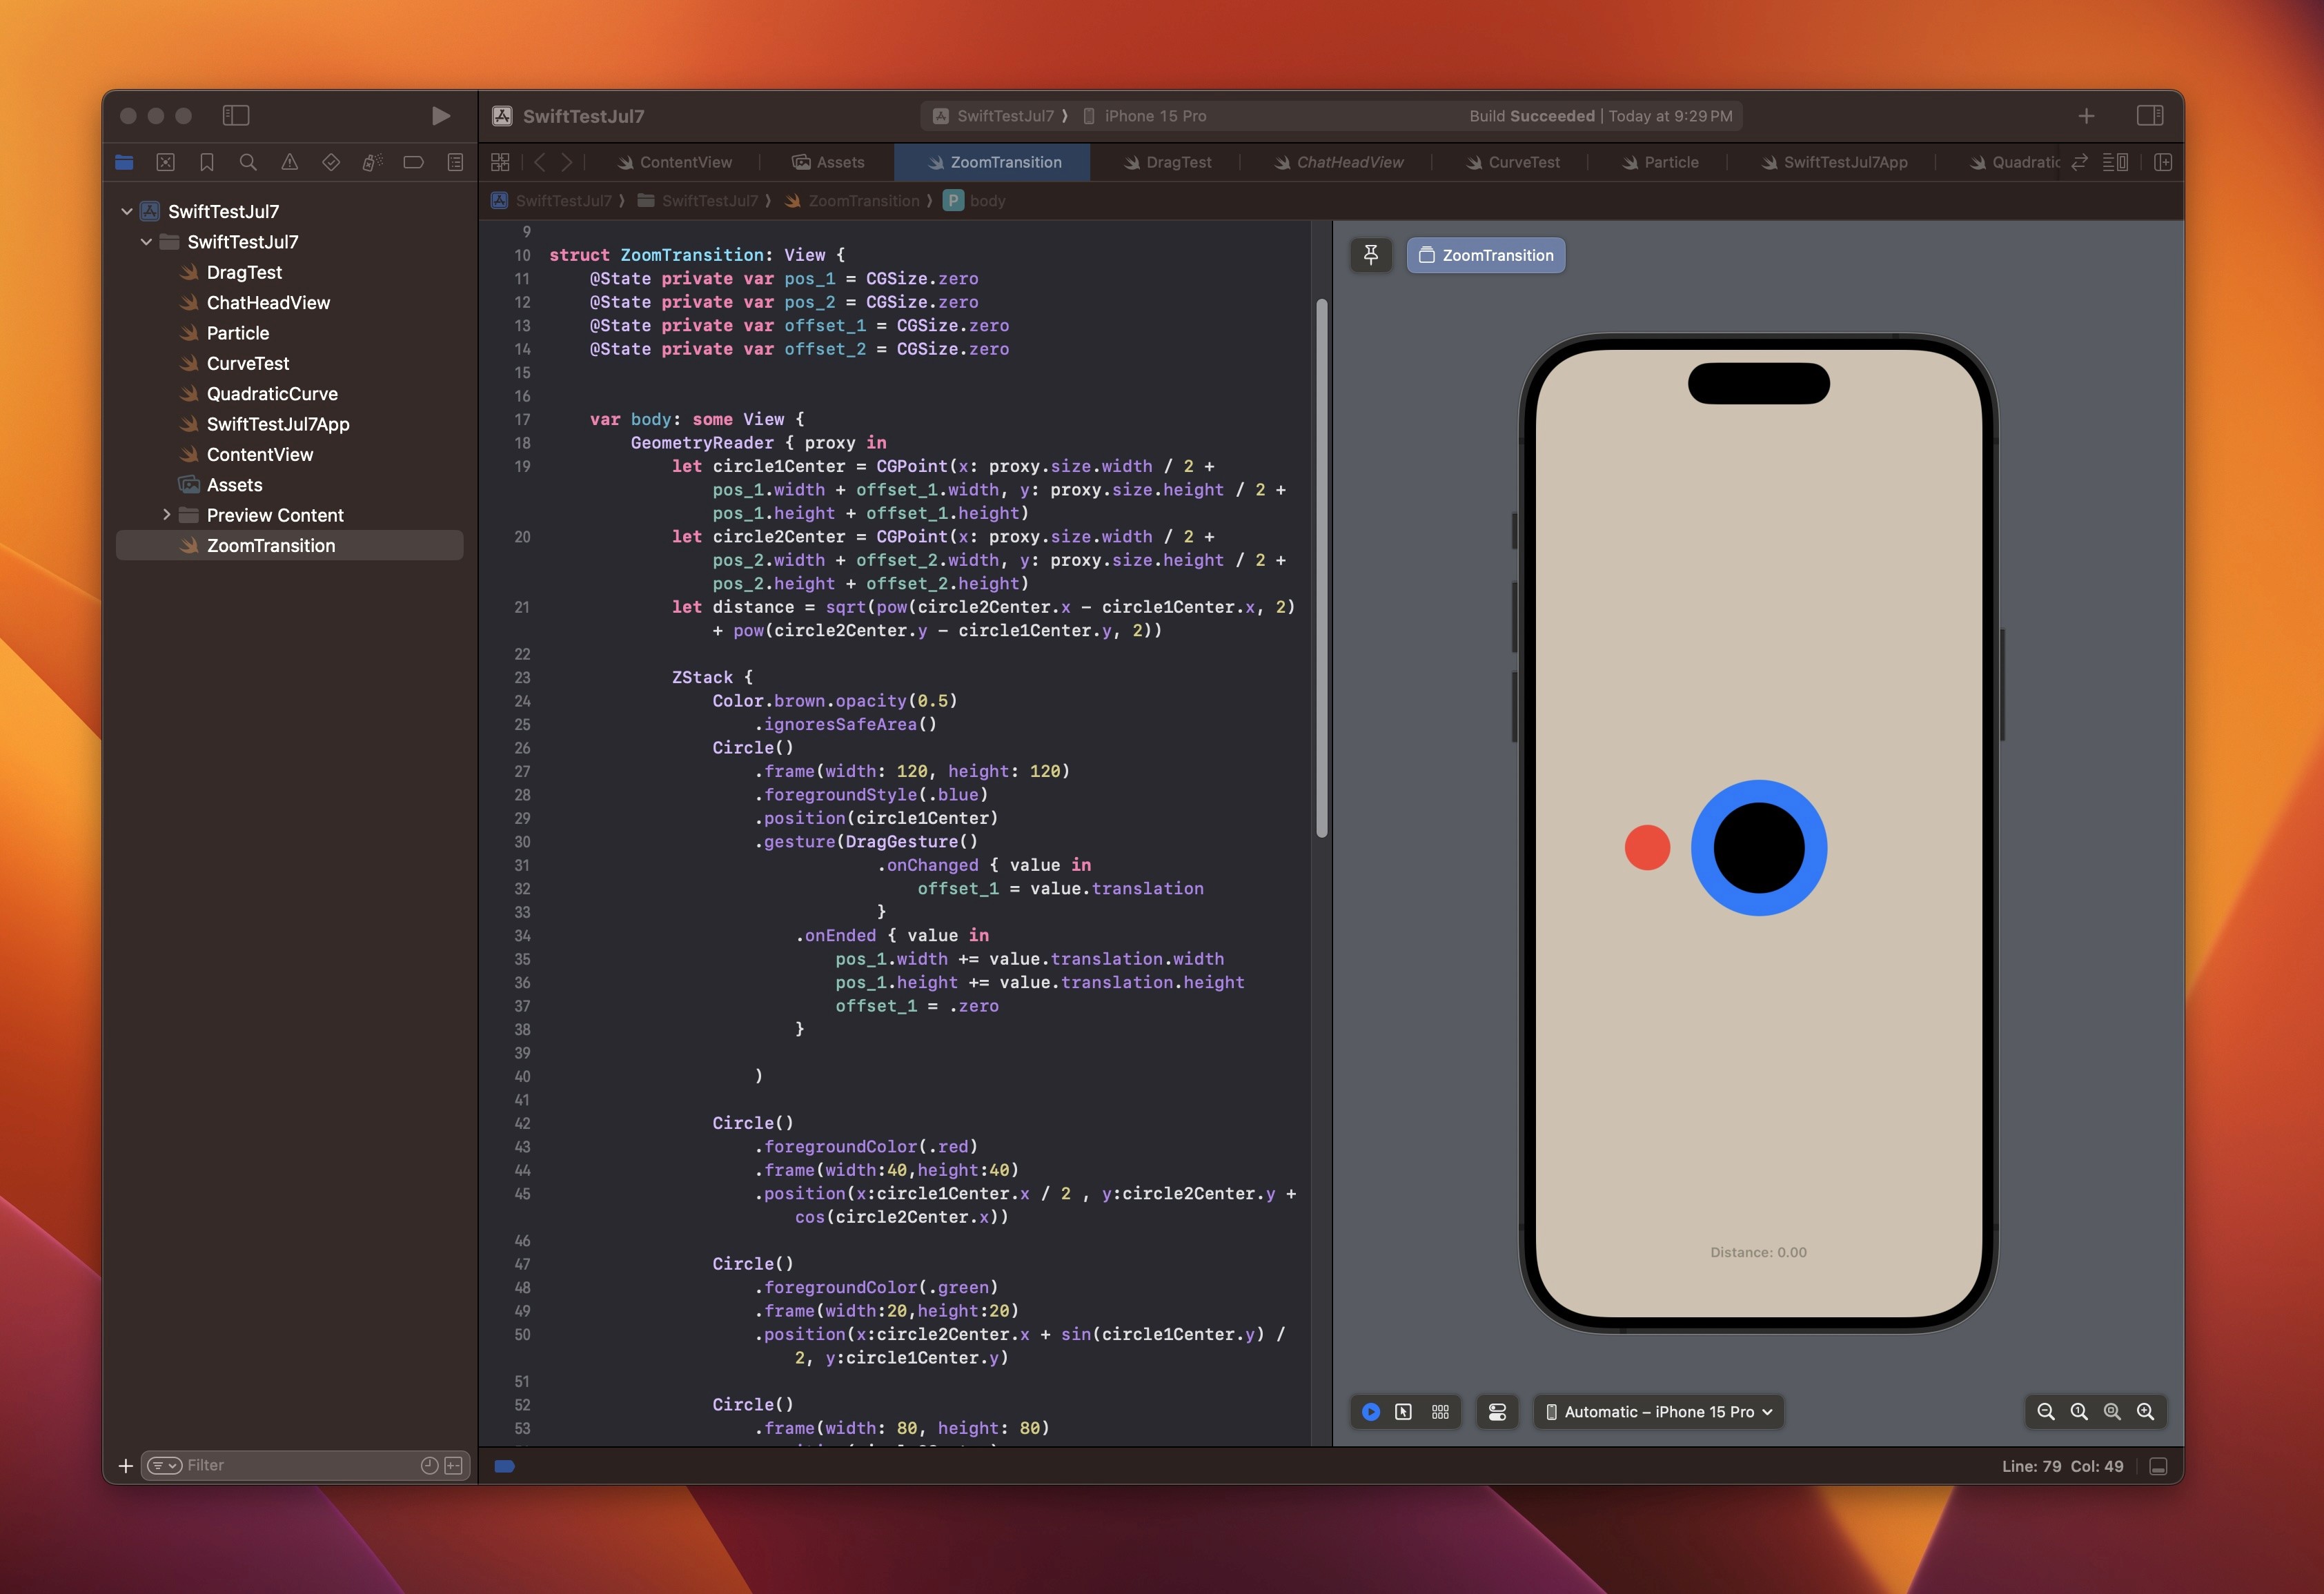
These days, I spend at least an hour or two on Xcode. It used to be just watching Youtube or occasional gaming but that lifestyle now completely changed and I just do something on Xcode like I try to beat some boss in video game.
I feel like my skill got significantly improved as I kept practicing these. Still a long way to go but it's pretty amazing that I can just prototype something without hiccup. And when I am stuck, LLM is my good friend to help me navigate that. Amount of stuffs that I can try in given time got increased. I make a few prototype just to learn
So I'd like to archive some of them here.
Learning SwiftData
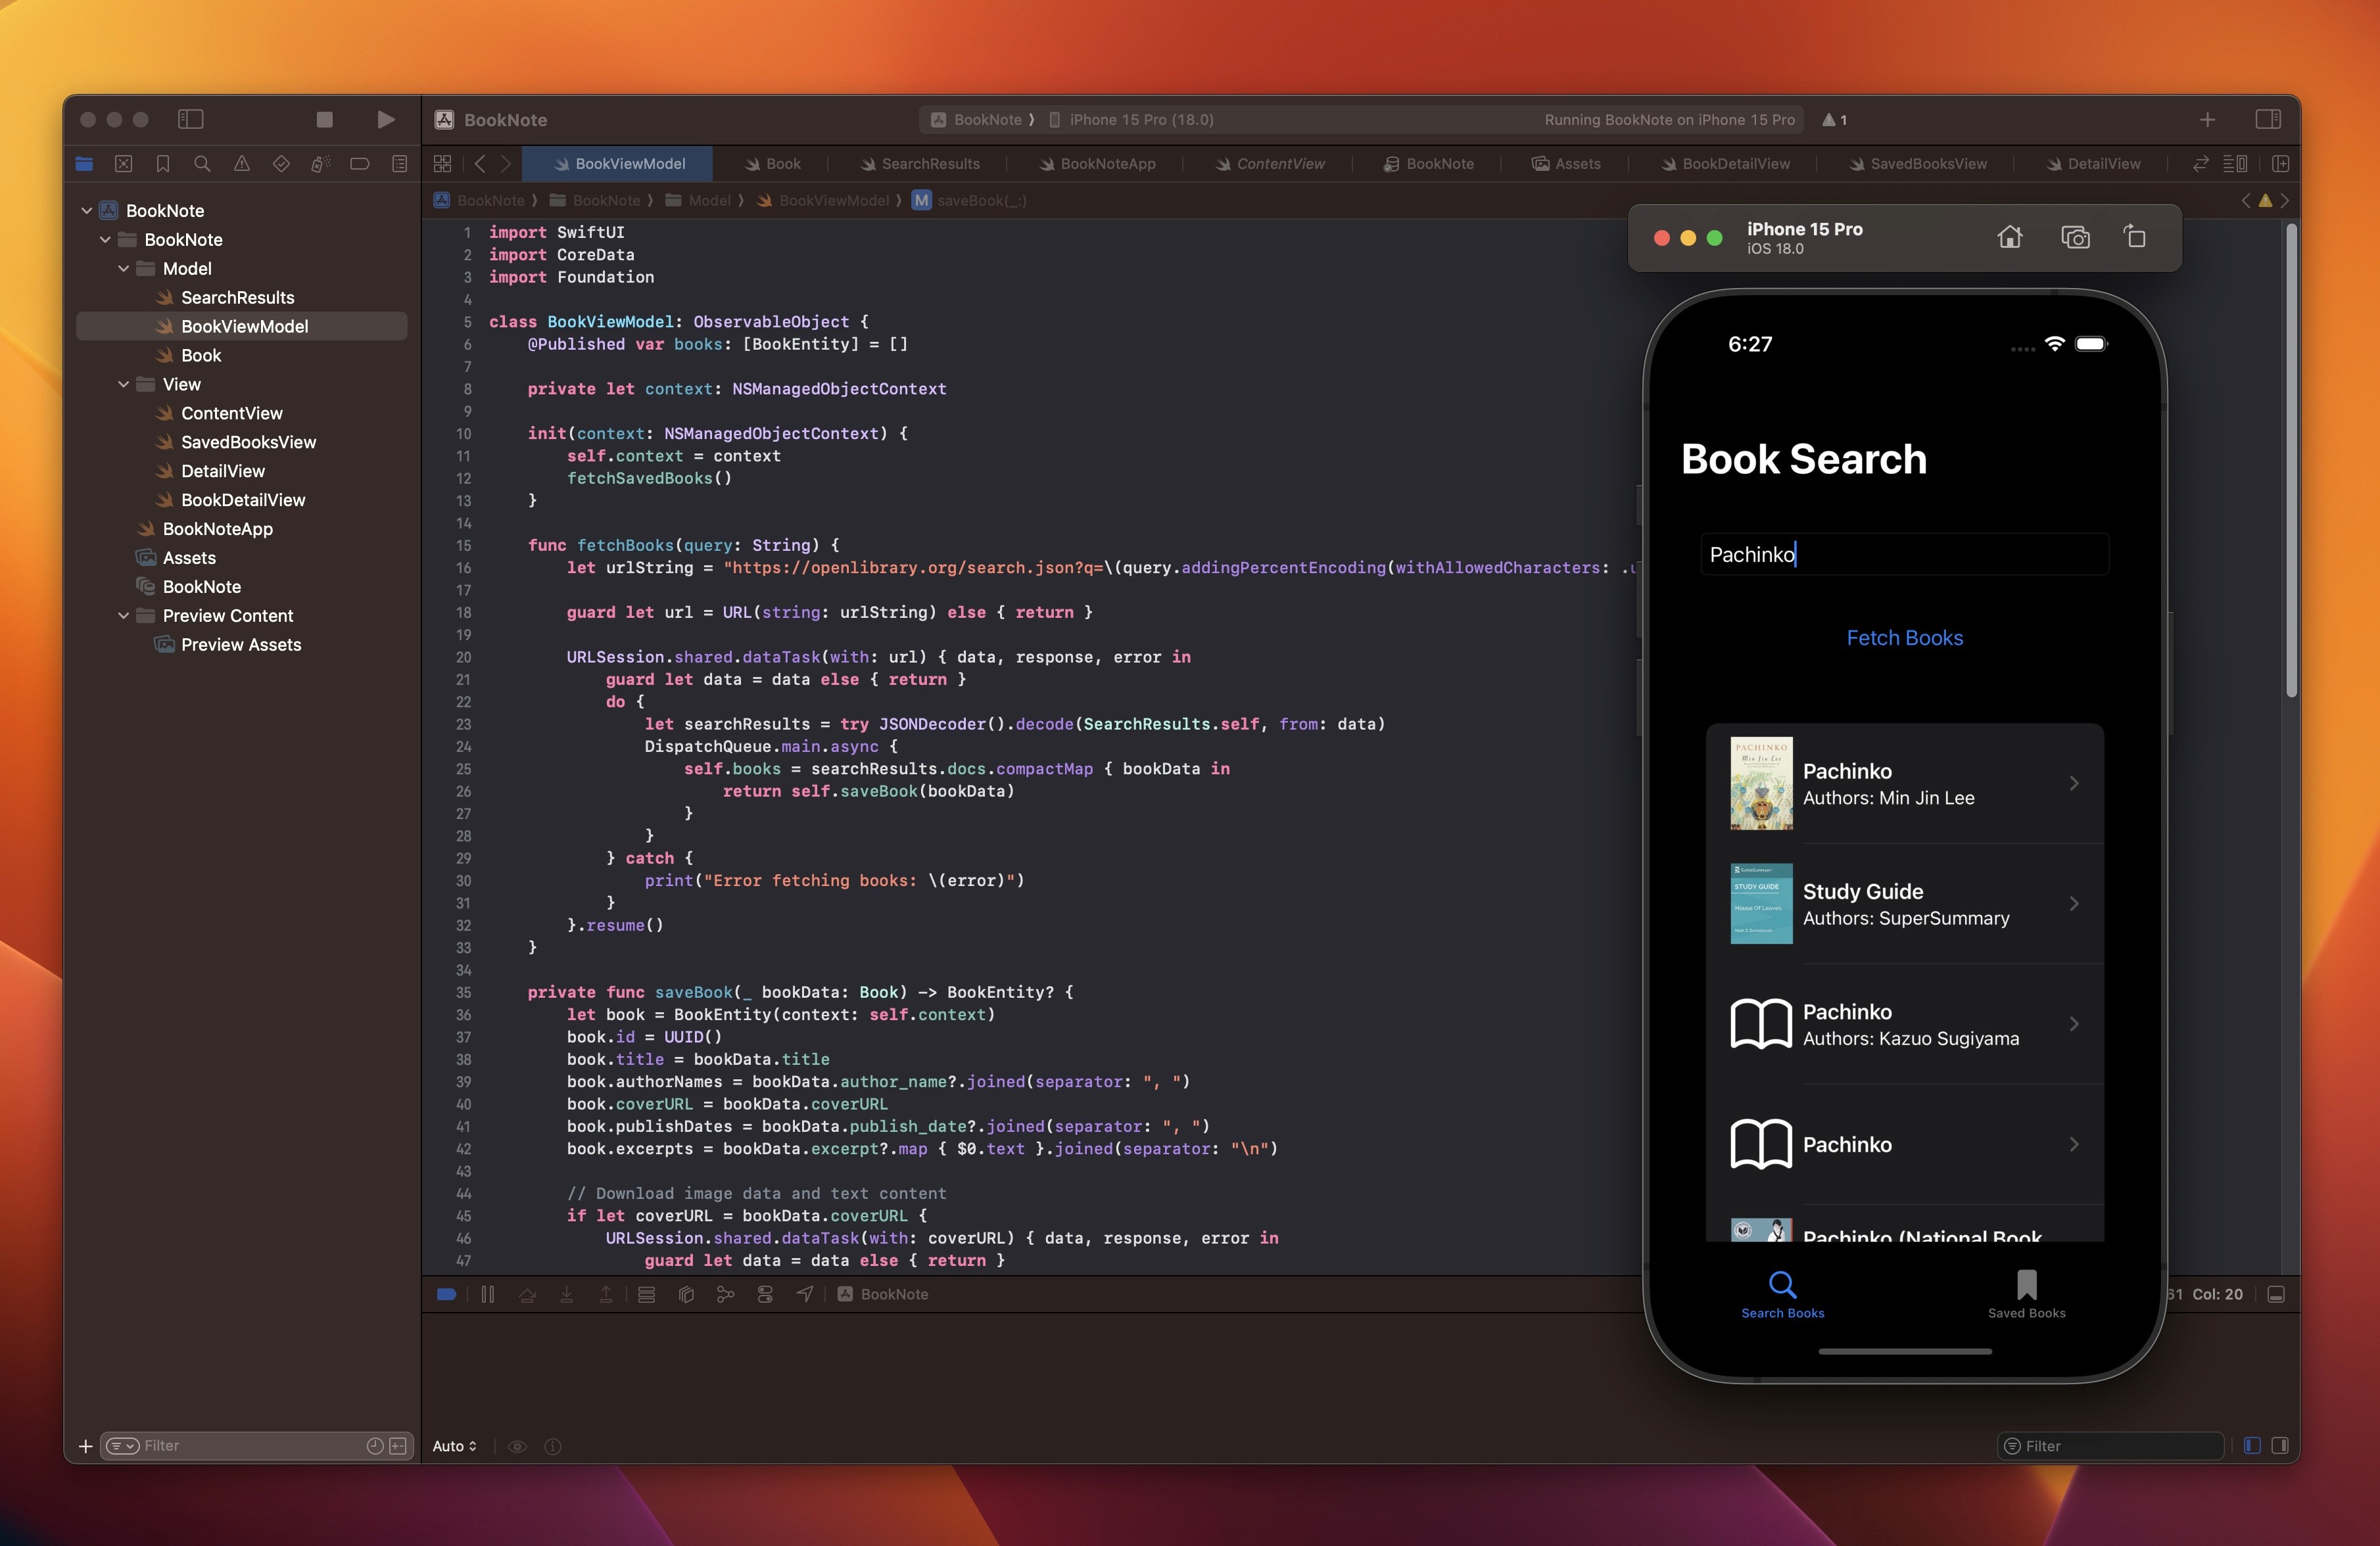
I've been spending most of time on the frond end side, I didn't have much of interests in data structure or API stuff but wanted to learn how to store data at least. So I tried something like fetching data from API (openlibrary.org) and store them in SwiftData. I didn't know how to do this at all so I just asked ChatGPT to do it.
  func fetchBooks(query: String) {
        let urlString = "https://openlibrary.org/search.json?q=\(query.addingPercentEncoding(withAllowedCharacters: .urlQueryAllowed) ?? "")"

        guard let url = URL(string: urlString) else { return }

        URLSession.shared.dataTask(with: url) { data, response, error in
            guard let data = data else { return }
            do {
                let searchResults = try JSONDecoder().decode(SearchResults.self, from: data)
                DispatchQueue.main.async {
                    self.books = searchResults.docs.compactMap { bookData in
                        return self.saveBook(bookData)
                    }
                }
            } catch {
                print("Error fetching books: \(error)")
            }
        }.resume()
    }
It's always amazing that I can start with something functioning. Definitely supercharging my productivity. Probably couldn't even imagine starting something like this without AI. I ended up creating a frontend, and basic functions enable fetching and saving.

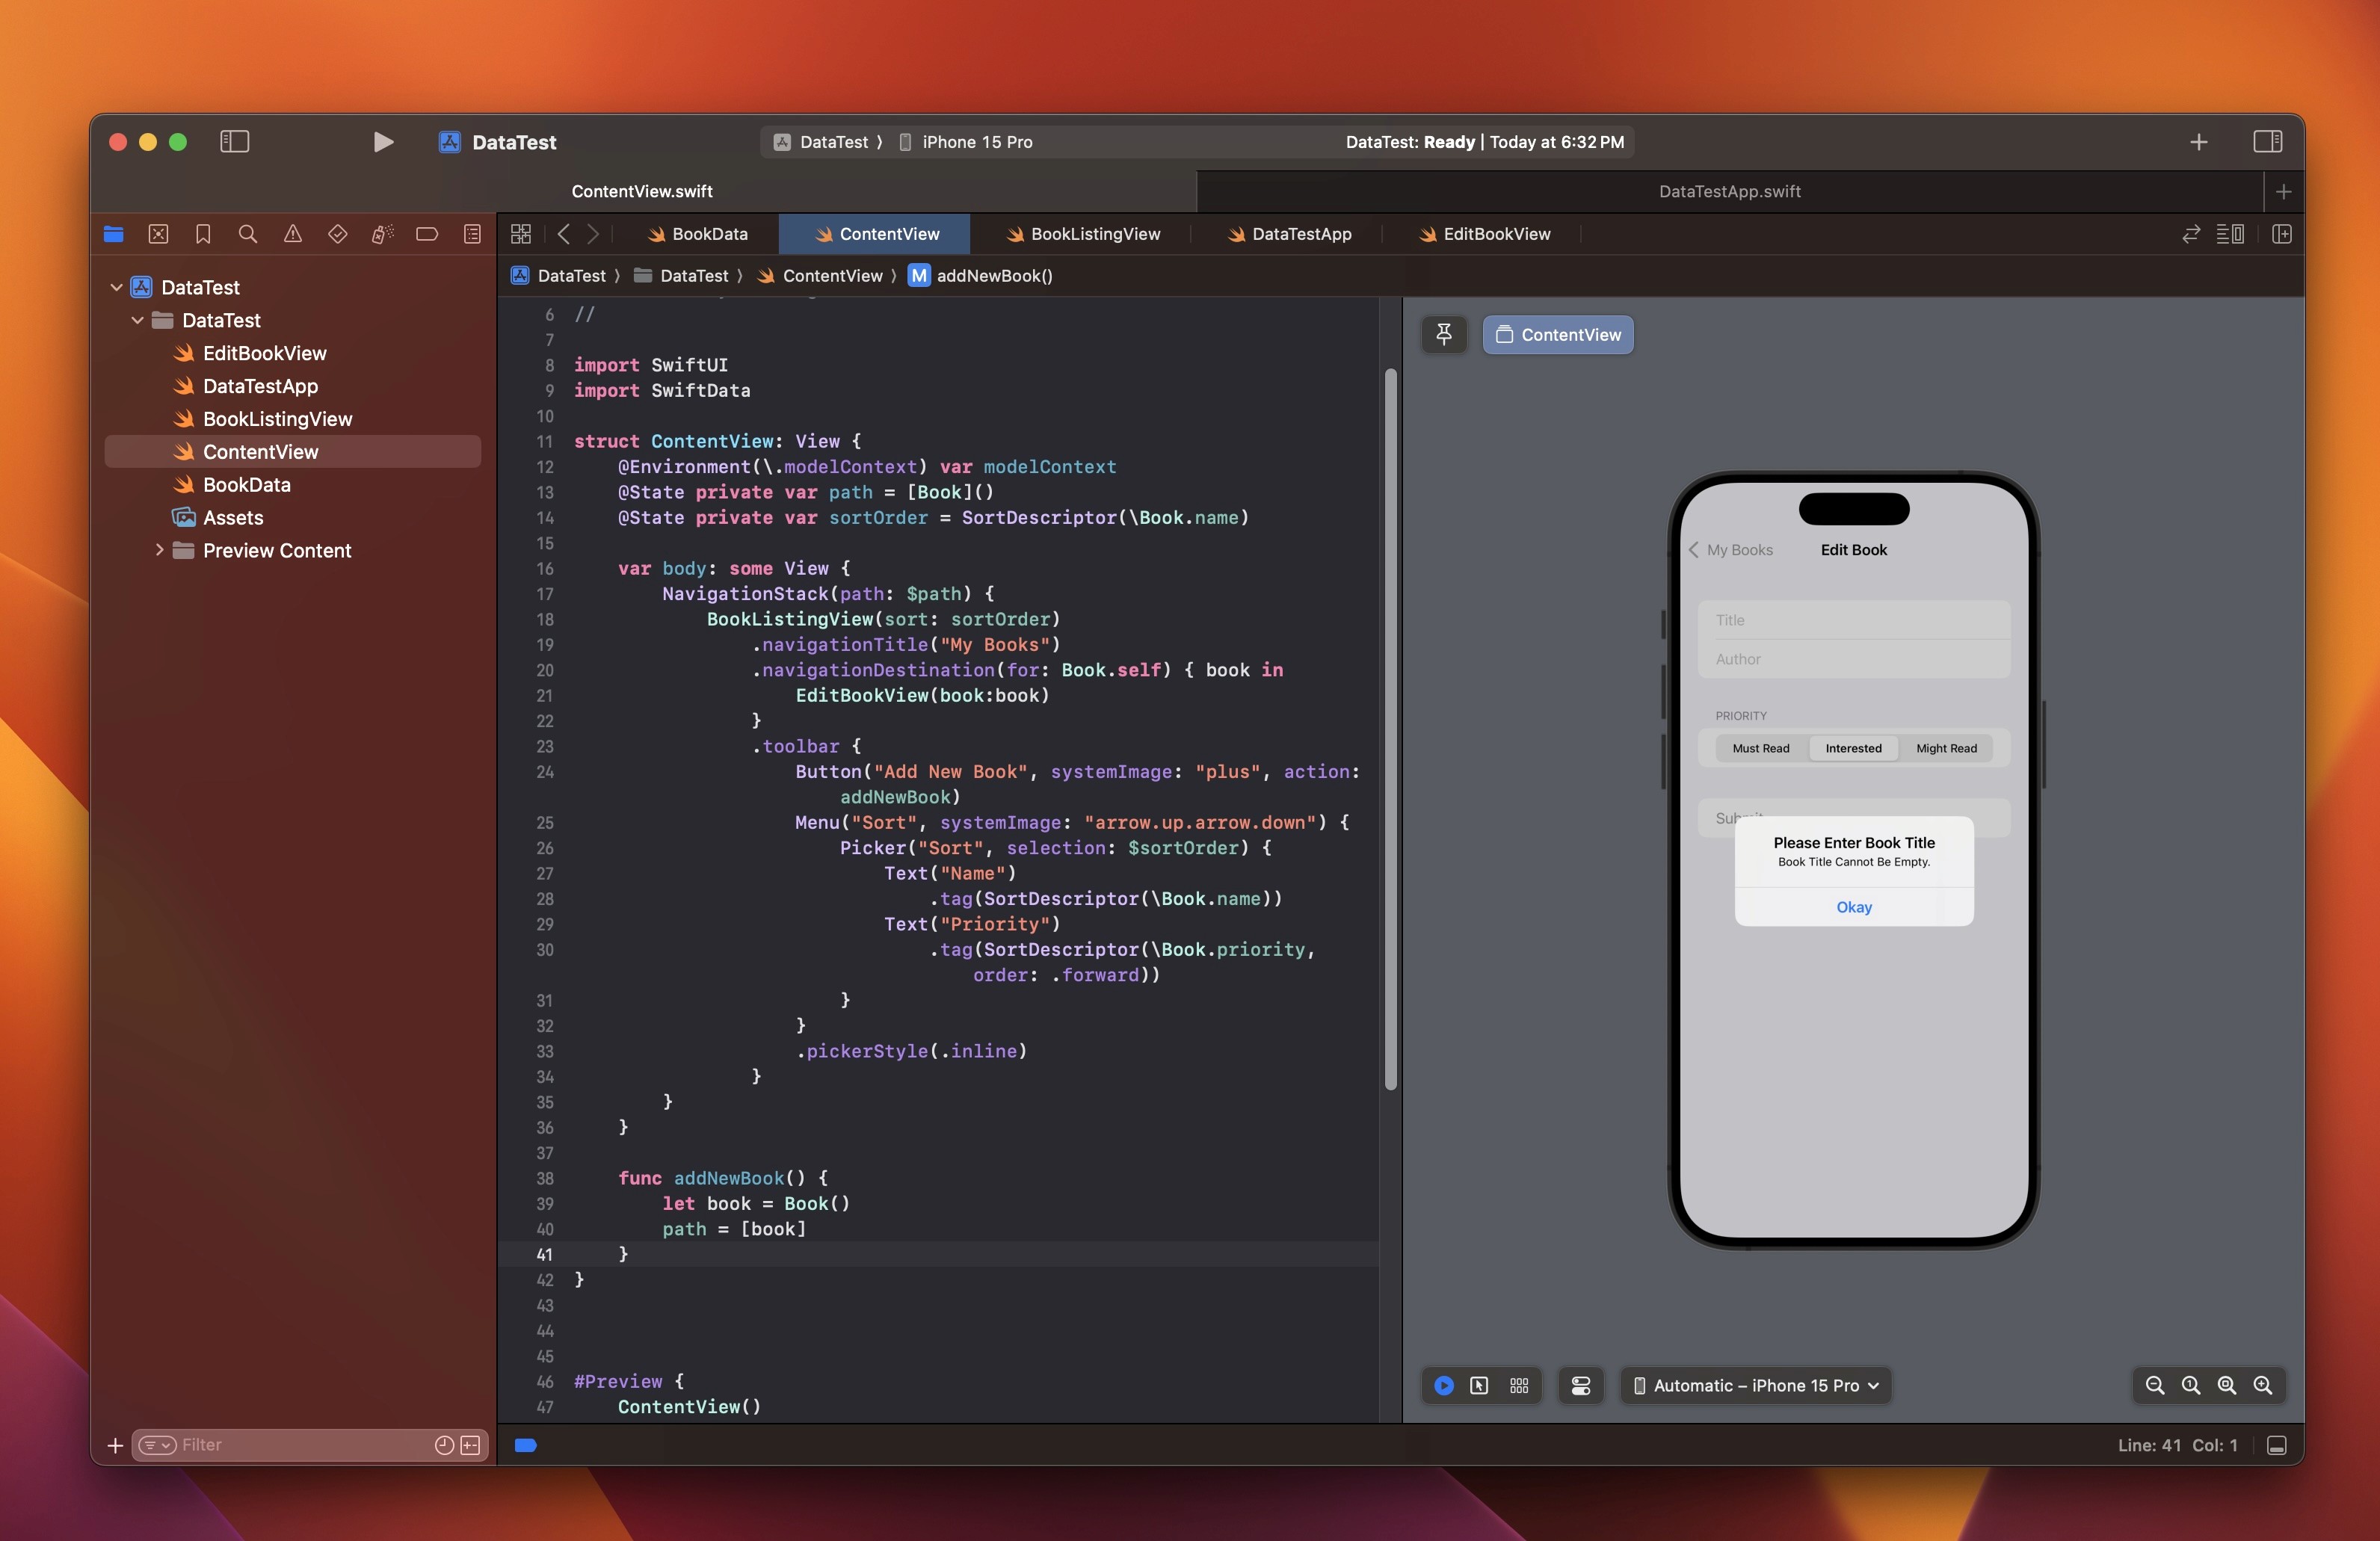
Then I moved on to more fundamental side of it and followed Paul Hudson's SwiftData course. Really love all of the stuffs he created. He might be one of key reasons why I could pick up SwiftUI after all. So I followed his course and was able to build a very basic data storing app. I also added some extra touches like explicit submit button, error message when users don't enter the title and try to submit data. I promised to make something with this barebone to my wife so hopefully this will lead me to somewhere from here.

Understanding Math
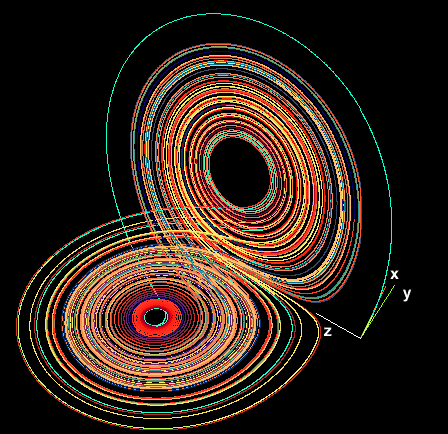
Other than that, I spent a lot of time drawing dots on the canvas. These days I'm really drawn into geometric graphical experiments and to my surprise, was able to encounter really good inspirations / courses. One nice find was the concept of attractors (thanks Sri). I went to Youtube to find a course about the lorenz attractor.

It's just fascinating to learn that some equations draw this beautiful shape - or some shapes can be calculated to simple equation. So I converted this to SwiftUI and this is what I ended up with.
Getting to know +=
Other than that, I started to utilized += to make values more additive. This is very useful when you want to retain previous position to enable smooth dragging / scrolling. Or make overall movement more continuous and fluid. For example, when you just assign translation value in dragging event, it'll pop to (seemingly) random position so from 2nd dragging everything starts to feel off.
 Circle()
  .frame(width:100,height:100)
  .offset(offset)
  .gesture(
      DragGesture()
         .onChanged { value in
            offset = value.translation // this will make 2nd dragging awful
          }
  )
This is because value.translation will always go back to zero when drag is ended. So instead of where it was, it moves to initial value.translation position which will not be the same position. So you experience that "tick" soon as you start dragging 2nd time. You can see how annoying that is below.
So you would like to do this instead.
Circle()
    .frame(width:100,height:100)
    .offset(x:pos.width+offset.width, y:pos.height+offset.height)
    .gesture(
        DragGesture()
            .onChanged { value in
                offset.width = value.translation.width
                offset.height = value.translation.height
            }
            .onEnded { value in
                pos.width += offset.width
                pos.height += offset.height
                offset = .zero
            }
    )
This uses two variables. one (offset) to capture dragging gesture and another (pos) to record the progress so far. And always reset offset when drag is ended so that it can start fresh when you start dragging again. This basically makes all the state identical as zero state but just change that starting position every time the drag is ended.
So you can basically do something like this :
You can apply this basic knowledge to many other stuffs. I came across this DVD screensaver idea back in the days.
Pretty neat! If you want to see the full code of DVD example, I uploaded on the github.
It was very fulfilling past couple of weeks for me. I was able to learn a lot and personally feel I grew a lot as well. It's genuinely fun to learn SwiftUI and get better at prototyping with it. Truly reminds me of old days of Framer. I hope you enjoyed this post and hopefully inspired you to learn SwiftUI.
If you want to connect - you can always reach out to one of my socials. I'll wrap my blog with some more examples that I put together.
Snippets from past 3 weeks

These days, I spend at least an hour or two on Xcode. It used to be just watching Youtube or occasional gaming but that lifestyle now completely changed and I just do something on Xcode like I try to beat some boss in video game.
I feel like my skill got significantly improved as I kept practicing these. Still a long way to go but it's pretty amazing that I can just prototype something without hiccup. And when I am stuck, LLM is my good friend to help me navigate that. Amount of stuffs that I can try in given time got increased. I make a few prototype just to learn
So I'd like to archive some of them here.
Learning SwiftData
I've been spending most of time on the frond end side, I didn't have much of interests in data structure or API stuff but wanted to learn how to store data at least. So I tried something like fetching data from API (openlibrary.org) and store them in SwiftData. I didn't know how to do this at all so I just asked ChatGPT to do it.
  func fetchBooks(query: String) {
        let urlString = "https://openlibrary.org/search.json?q=\(query.addingPercentEncoding(withAllowedCharacters: .urlQueryAllowed) ?? "")"

        guard let url = URL(string: urlString) else { return }

        URLSession.shared.dataTask(with: url) { data, response, error in
            guard let data = data else { return }
            do {
                let searchResults = try JSONDecoder().decode(SearchResults.self, from: data)
                DispatchQueue.main.async {
                    self.books = searchResults.docs.compactMap { bookData in
                        return self.saveBook(bookData)
                    }
                }
            } catch {
                print("Error fetching books: \(error)")
            }
        }.resume()
    }
It's always amazing that I can start with something functioning. Definitely supercharging my productivity. Probably couldn't even imagine starting something like this without AI. I ended up creating a frontend, and basic functions enable fetching and saving.

Then I moved on to more fundamental side of it and followed Paul Hudson's SwiftData course. Really love all of the stuffs he created. He might be one of key reasons why I could pick up SwiftUI after all. So I followed his course and was able to build a very basic data storing app. I also added some extra touches like explicit submit button, error message when users don't enter the title and try to submit data. I promised to make something with this barebone to my wife so hopefully this will lead me to somewhere from here.

Understanding Math
Other than that, I spent a lot of time drawing dots on the canvas. These days I'm really drawn into geometric graphical experiments and to my surprise, was able to encounter really good inspirations / courses. One nice find was the concept of attractors (thanks Sri). I went to Youtube to find a course about the lorenz attractor.

It's just fascinating to learn that some equations draw this beautiful shape - or some shapes can be calculated to simple equation. So I converted this to SwiftUI and this is what I ended up with.
Getting to know +=
Other than that, I started to utilized += to make values more additive. This is very useful when you want to retain previous position to enable smooth dragging / scrolling. Or make overall movement more continuous and fluid. For example, when you just assign translation value in dragging event, it'll pop to (seemingly) random position so from 2nd dragging everything starts to feel off.
 Circle()
  .frame(width:100,height:100)
  .offset(offset)
  .gesture(
      DragGesture()
         .onChanged { value in
            offset = value.translation // this will make 2nd dragging awful
          }
  )
This is because value.translation will always go back to zero when drag is ended. So instead of where it was, it moves to initial value.translation position which will not be the same position. So you experience that "tick" soon as you start dragging 2nd time. You can see how annoying that is below.
So you would like to do this instead.
Circle()
    .frame(width:100,height:100)
    .offset(x:pos.width+offset.width, y:pos.height+offset.height)
    .gesture(
        DragGesture()
            .onChanged { value in
                offset.width = value.translation.width
                offset.height = value.translation.height
            }
            .onEnded { value in
                pos.width += offset.width
                pos.height += offset.height
                offset = .zero
            }
    )
This uses two variables. one (offset) to capture dragging gesture and another (pos) to record the progress so far. And always reset offset when drag is ended so that it can start fresh when you start dragging again. This basically makes all the state identical as zero state but just change that starting position every time the drag is ended.
So you can basically do something like this :
You can apply this basic knowledge to many other stuffs. I came across this DVD screensaver idea back in the days.
Pretty neat! If you want to see the full code of DVD example, I uploaded on the github.
It was very fulfilling past couple of weeks for me. I was able to learn a lot and personally feel I grew a lot as well. It's genuinely fun to learn SwiftUI and get better at prototyping with it. Truly reminds me of old days of Framer. I hope you enjoyed this post and hopefully inspired you to learn SwiftUI.
If you want to connect - you can always reach out to one of my socials. I'll wrap my blog with some more examples that I put together.
Snippets from past 3 weeks

These days, I spend at least an hour or two on Xcode. It used to be just watching Youtube or occasional gaming but that lifestyle now completely changed and I just do something on Xcode like I try to beat some boss in video game.
I feel like my skill got significantly improved as I kept practicing these. Still a long way to go but it's pretty amazing that I can just prototype something without hiccup. And when I am stuck, LLM is my good friend to help me navigate that. Amount of stuffs that I can try in given time got increased. I make a few prototype just to learn
So I'd like to archive some of them here.
Learning SwiftData
I've been spending most of time on the frond end side, I didn't have much of interests in data structure or API stuff but wanted to learn how to store data at least. So I tried something like fetching data from API (openlibrary.org) and store them in SwiftData. I didn't know how to do this at all so I just asked ChatGPT to do it.
  func fetchBooks(query: String) {
        let urlString = "https://openlibrary.org/search.json?q=\(query.addingPercentEncoding(withAllowedCharacters: .urlQueryAllowed) ?? "")"

        guard let url = URL(string: urlString) else { return }

        URLSession.shared.dataTask(with: url) { data, response, error in
            guard let data = data else { return }
            do {
                let searchResults = try JSONDecoder().decode(SearchResults.self, from: data)
                DispatchQueue.main.async {
                    self.books = searchResults.docs.compactMap { bookData in
                        return self.saveBook(bookData)
                    }
                }
            } catch {
                print("Error fetching books: \(error)")
            }
        }.resume()
    }
It's always amazing that I can start with something functioning. Definitely supercharging my productivity. Probably couldn't even imagine starting something like this without AI. I ended up creating a frontend, and basic functions enable fetching and saving.

Then I moved on to more fundamental side of it and followed Paul Hudson's SwiftData course. Really love all of the stuffs he created. He might be one of key reasons why I could pick up SwiftUI after all. So I followed his course and was able to build a very basic data storing app. I also added some extra touches like explicit submit button, error message when users don't enter the title and try to submit data. I promised to make something with this barebone to my wife so hopefully this will lead me to somewhere from here.

Understanding Math
Other than that, I spent a lot of time drawing dots on the canvas. These days I'm really drawn into geometric graphical experiments and to my surprise, was able to encounter really good inspirations / courses. One nice find was the concept of attractors (thanks Sri). I went to Youtube to find a course about the lorenz attractor.

It's just fascinating to learn that some equations draw this beautiful shape - or some shapes can be calculated to simple equation. So I converted this to SwiftUI and this is what I ended up with.
Getting to know +=
Other than that, I started to utilized += to make values more additive. This is very useful when you want to retain previous position to enable smooth dragging / scrolling. Or make overall movement more continuous and fluid. For example, when you just assign translation value in dragging event, it'll pop to (seemingly) random position so from 2nd dragging everything starts to feel off.
 Circle()
  .frame(width:100,height:100)
  .offset(offset)
  .gesture(
      DragGesture()
         .onChanged { value in
            offset = value.translation // this will make 2nd dragging awful
          }
  )
This is because value.translation will always go back to zero when drag is ended. So instead of where it was, it moves to initial value.translation position which will not be the same position. So you experience that "tick" soon as you start dragging 2nd time. You can see how annoying that is below.
So you would like to do this instead.
Circle()
    .frame(width:100,height:100)
    .offset(x:pos.width+offset.width, y:pos.height+offset.height)
    .gesture(
        DragGesture()
            .onChanged { value in
                offset.width = value.translation.width
                offset.height = value.translation.height
            }
            .onEnded { value in
                pos.width += offset.width
                pos.height += offset.height
                offset = .zero
            }
    )
This uses two variables. one (offset) to capture dragging gesture and another (pos) to record the progress so far. And always reset offset when drag is ended so that it can start fresh when you start dragging again. This basically makes all the state identical as zero state but just change that starting position every time the drag is ended.
So you can basically do something like this :
You can apply this basic knowledge to many other stuffs. I came across this DVD screensaver idea back in the days.
Pretty neat! If you want to see the full code of DVD example, I uploaded on the github.
It was very fulfilling past couple of weeks for me. I was able to learn a lot and personally feel I grew a lot as well. It's genuinely fun to learn SwiftUI and get better at prototyping with it. Truly reminds me of old days of Framer. I hope you enjoyed this post and hopefully inspired you to learn SwiftUI.
If you want to connect - you can always reach out to one of my socials. I'll wrap my blog with some more examples that I put together.